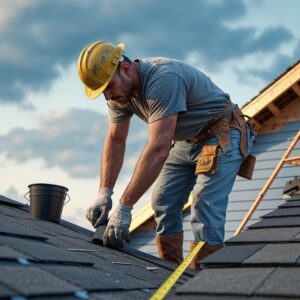
Roofing installation is an important part of any building project, as working at height can pose injury risks. Whether you are replacing your old roof or installing a new one, understanding each step and how to proceed is essential for homeowners or professional roofers. New roofing involves removing an old material (if any) carefully without damaging the structure, fixing any needed repairs, and installing the new roofing material with specific instructions.
All these steps for roofing a house in Norwich or the UK generally demand exceptional knowledge of instruments and skills to apply them properly and ensure a well-functioning structure.
| Required Tools For a Roof InstallationProtective gear like helmets, harnesses, gloves and goggles.Ladders and scaffolding for safe access.Roofing Nail gun to drive the nails quickly and accurately.Measuring tape to estimate the roof area precisely.Air compressor to power the nails.Roofing Hammer for securing shingles.Tear-off shovel for removing old shingles.Utility Knife to cut the materials.Chalk line for straight shingle alignment.Tarps to catch debris during removal.Pry Bar for removing old nails. |
Roof Installation Process | Detailed Roofing Guide for Secure Structuring
Re-roofing or installing a new roof in Norwich can be hectic. The process varies significantly depending on the material used, requiring skills to handle the equipment and roofing tiles. Asphalt shingles are light and can be easily installed compared to others if you are considering doing it yourself. It may save you substantial costs, but DIY roofing can last longer than usual and can cause serious hazards if you are not a seasoned professional.
However, for other materials like slating and tiling, hiring a Norwich roofing expert is always recommended to ensure the installed roof can withstand harsh weather conditions and get warranties on these expensive and heavy materials.
| Safety Concerns When Installing a Roof YourselfRisk of falls from the height.Adverse weather conditions such as rain and high winds can make roofs slippery and increase accidents.Working near power lines or electrical components poses risks of electrocution.DIYers may not use safety equipment or may lack training in its use.Unstable surfaces or damaged old roof areas lead to collapse when walked on. |
Step # 1: Plan and Prepare
Proper planning with all the tools needed helps in a smooth roofing project. This helps target the exact point of the issue without damaging the surrounding material.
- Begin with a thorough inspection of the existing roof or schedule it with a professional to determine the need for re-roofing.
- Evaluate all factors, such as the roof’s age, type, and any existing damage (which needs to be addressed during installation).
- Choosing roofing materials based on your budget and local climate. Must consider the expected lifespan of the material to avoid early replacement in future. Opt for popular or most common roofing options such as asphalt shingles, metals, tile and slate.
- Doing it yourself? Then, make a list of tools and materials (flashing, underlayment, drip edge, nails) required for the roofing project. Have anything ready beforehand to ensure a smooth installation.
- Gather the necessary permits from local authorities if you are altering the structure, changing the existing material to a different one, or raising the height. This is crucial to ensure compliance with building codes and avoid any legal issues. Many roofers are aware of the complexities and can help you with planning permission procedures.
Step # 2: Remove the Old Roof
This could be a labour-intensive step, but it ensures a clean and solid foundation for a new roof. Clearing all the material from the old roof, including adhesive leftovers, is essential to secure the new shingles effectively.
- Cover landscaping and surrounding areas with tarps to catch the debris and create less mess.
- Use plywood to shield windows and doors.
- Start from the top with tear-off forks and notched shovels to remove ridge caps and shingles. Work downwards and carefully peel back each layer to reach the underlying roof deck.
- After the shingles are off, ensure all nails are pulled or hammered down flush with the decking to prepare for new materials.
- Clear all the waste from the roof to create a clean, safe workspace.
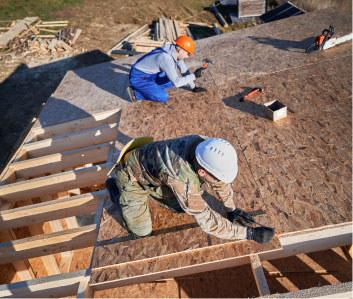
Step # 3: Evaluate and Repair the Roof Deck
The roof deck is a sturdy layer of plywood or oriented strand board that lies between the structural framework and roofing material. It provides solid structural support and weather protection. Inspecting the roof deck before installing a new material is crucial for its longevity and effectiveness.
- Look for signs of sagging, rot or water damage in the deck.
- Inspect rafter, trusses and decking for structural integrity.
- Pay attention to the places where the roof and walls meet, as well as the vicinity of vents and chimneys.
- Check the reliability of the roof’s support structure to ensure it can handle the weight of the new roofing materials.
- Replace any compromised areas like damaged or rotted wood in the decking before proceeding next.
- If needed, add blocking or nailers to provide extra support in weak areas.
Step # 4: Install a Drip Edge While Roofing a House
Although it may not be strictly necessary for all roofing types, installing a drip edge is a valuable investment that will prolong the life of your new roof. It effectively manages water and shields against wind-driven rain.
- Start placing the drip edge along the roof’s eaves. The wind flange should slide under the first course of shingles.
- If using multiple sections, ensure a 2-3 inch overlap to prevent water seepage.
- Fix roofing nails spaced about 12 inches apart to secure the drip edge and make sure they sit flush with the surface.
- Apply roofing cement along the top of the drip edge to enhance waterproofing.
- While installing, check periodically to ensure that the material is lying straight and aligned with the roof edge.
- Fold and secure corners tightly to prevent leaks.
Step # 5: Apply Roof Underlayment
Underlayment helps protect the deck from water infiltration. It also creates a smooth surface for shingles, which helps achieve a uniform appearance for re-roofing.
- Select appropriate underlayment (felt or synthetic) based on your roofing type and climate.
- Begin from the lowest point of the roof and roll out the underlayment horizontally.
- Make certain it lays approximately 1.5 inches over the drip edge.
- Keep the underlayment smooth to prevent any bubbles or wrinkles.
- Nail at every 24 inches in the field area and along edges, fix about 12 inches apart.
- For each new row, overlap the previous one by at least 6 inches. Stagger seams between rows to enhance water resistance.
- Make sure there are no gaps or exposed areas, and re-nail any loose sections.
Step # 6: Install Flashing Around Roof Penetration
Flashing is the most critical component that you can not miss while installing a new roof. It helps prevent water from entering vulnerable areas or corners of the inside. When installing new flashing, pay special attention to its proper securing.
- Start at the bottom of any vertical walls or chimneys where the roof meets.
- Place the first piece of step flashing on top of the underlayment, ensuring it extends onto the roof deck and up the wall.
- Secure the flashing into place with two nails, but do not nail it to the wall to allow for movement.
- Each piece of step flashing should overlap the course of shingles below by at least 2 inches.
- Install corner flashing by positioning it at the intersection of two walls and securing it in place.
- Apply roofing sealant along the edges and overlaps for added waterproofing.
Step # 7: Lay the Roofing Materials
Once you think the underlying materials are properly secured and will function properly, it is time to give your home an aesthetic look with new roofing shingles. Understand the difference between each roof type installation to ensure perfection in the work.
- For Asphalt Shingles
Begin by laying down at the bottom edge of the roof and work your way up. Overlapping each row to ensure water shed properly.
- For Metal Roofs
Metal panels are typically larger and heavier, requiring careful handling. It involves securing panels with screws and clips, which often need pre-drilled holes. Overlap the metal panels tightly for a watertight seal.
- For Slate Tiles
Slate requires a solid underlayment and should be installed in a staggered pattern. It is secured with copper or stainless steel nails, typically two nails per tile. Due to the weight and fragility of the material, slate installation is labour-intensive.
- For Wood Shakes
Lay down the material in a staggered pattern, using nails for secure fastening. Continue installing shakes in overlapping rows, maintaining consistent spacing and joints for effective drainage.
- For Thermoplastic Olefin
Roll out TPO sheets over the deck and secure them with mechanical fasteners or adhesive. Overlap seams and heat-weld them for a watertight seal.
Step # 8: Install Ridge Cap
The ridge cap is installed along the roof’s peak to provide extra protection and a clean finish. It also helps with ventilation to reduce moisture buildup in the attic.
- Determine the length of the ridge and cut the cap to size, adding a few extra inches on each end for proper fitting.
- Use tin snips, a metal-cutting blade for metal caps, or a utility knife for asphalt shingles.
- For metal roofs, apply a high-quality adhesive along the ridge where the cap will be placed. This helps secure it in place.
- Place the cap over the peak of the roof to ensure it is centred and aligned with the slope.
- If using multiple pieces, overlap them to create a watertight barrier.
- Nail each piece in place to keep them secure in the windy conditions of Norwich.
Step # 9: Perform a Final Inspection
Final touches are crucial to confirm that everything meets building codes and safety regulations. They help address issues found during the inspection right away before they cause future problems.
- After finishing installation of all the materials, conduct a thorough inspection to check for any loose material, gaps, or other issues.
- Make sure every shingle or tile is secured tightly and no nails are exposed.
- Clear any leftover materials and debris from the roof and surrounding areas.
- Inspect gutters; they should be free of debris to allow proper drainage.
| Why Should You Hire a Professional to Roof a House?Most homeowners lack the necessary training and experience, which can lead to improper installation and costly repairs later on.DIY roofing projects often take longer than anticipated, especially for those without prior experience.Many roofing materials come with warranties that require professional installation; DIY work can void these warranties.Roofing is highly dangerous, and there is a high risk of falls and injuries from handling heavy equipment. An inexperienced person can greatly increase these risks.Professionals bring years of specialised knowledge and ensure quality processes.While DIY roofing may seem cheaper, experts can save money by avoiding costly mistakes.Local Norwich roofers are well aware of climatic issues on roofing and work accordingly with materials. |
Conclusion
Installing a roof is a detailed process that requires patience and precision. Following each step skillfully and paying attention to material detail can help you achieve a study, well-installed roof structure that will protect your home for years to come. Whether doing it yourself or hiring experts, proper inspection, applying sealant, and laying new material results in long-lasting structure.